

If your Sentro’s crank is getting stiff, stitches are dropping for no clear reason, or the machine has started clicking, it probably doesn’t need repair — it needs cleaning. Lint packs into the needle bed and gears, moving parts dry out, and friction does the rest. Fifteen minutes with a soft brush and a drop of the right lubricant fixes most of it.
This guide covers the two maintenance jobs every Sentro owner should know: how to clean a Sentro knitting machine properly, and how to lubricate it without overdoing it. It is based on the Spanish-language video tutorial “Como Aprender a limpiar y a lubricar tu Máquina sentro”, cross-checked against parts supplier Gerald Nimchuk’s published maintenance guide and other established Sentro care references. Where a tip rests on a single source, we say so.
Why Maintenance Matters
Most “my machine suddenly stopped working” complaints trace back to maintenance, not defects:
- Lint and yarn dust pack into the needle bed and gear teeth, increasing friction until the crank barely turns.
- Dry gears and cams wear faster and can start clicking or skipping.
- A dirty tensioner feeds yarn unevenly, which looks exactly like a dropped-stitch problem but isn’t one.
A short cleaning session every few projects prevents nearly all of this.
What You’ll Need
- A soft brush (a clean paintbrush or makeup brush works perfectly)
- A lint-free cloth, slightly damp, for the exterior
- A plastic-safe lubricant — a silicone-based lubricant is the safe choice for Sentro’s plastic gears and sliders, used in very small amounts
- Tweezers, for stubborn bits of yarn
What NOT to use: WD-40. It is a water displacer and solvent, not a lasting lubricant — it strips existing lubrication and leaves parts drier than before. This is one of the most repeated warnings among Sentro parts suppliers.
Part 1: Cleaning Your Sentro Machine
Step 1 — Remove the yarn. Take the working yarn out of the tensioner and needle hooks. If you’re mid-project you can leave the project on the needles, but cleaning is far easier with the machine empty.
Step 2 — Brush the needle bed. Sweep along the full circle of needles with the soft brush, flicking lint and fiber dust outward. Pay special attention to the base of each needle, where dust compacts hardest.
Step 3 — Clean the gears underneath. Turn the machine over (or tilt it) and brush the visible gear teeth and the crank mechanism. This is where most stiffness comes from — a surprising amount of fluff hides here.
Step 4 — Clear the tensioner and yarn guides. Run the brush through the tension discs and along the yarn guide. A clogged tensioner is a classic cause of uneven stitches.
Step 5 — Wipe the exterior. Use the slightly damp lint-free cloth on the plastic housing. Avoid harsh chemicals or solvents that can dull or damage the plastic.
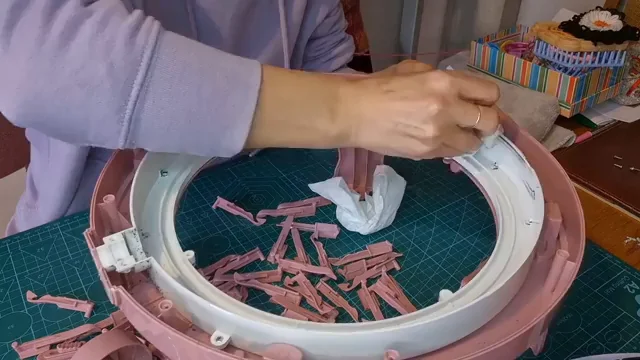
Step 6 — Check for damage while you’re in there. Look for bent needles, cracked needle guides, or a loose crank handle. Catching a bent needle now saves a whole row of dropped stitches later — and never keep knitting on a broken needle, it damages the machine. Replacement needles are inexpensive and worth keeping on hand.
From a daily user: Ailana Hecho a Mano (Analia Burgueño), creator of the original cleaning tutorial linked above, uses her SENTRO machines every day — for her own work and for activities with children at school. She does a deep clean, taking the machine apart, about every month to month and a half. For occasional hobby use, she says every two or three months can be enough — it depends a lot on how much you use the machine and on the yarn, since some yarns shed a great deal of lint and others leave almost no residue.
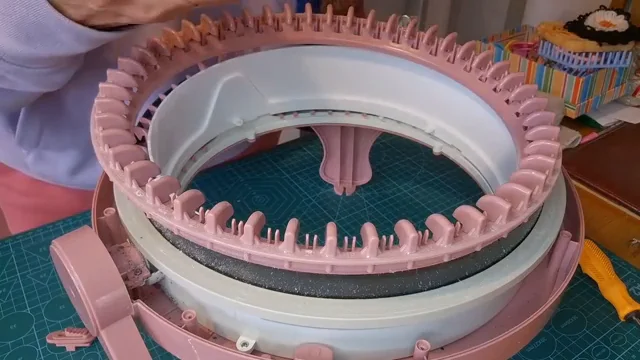
Part 2: Lubricating Your Sentro Machine
Lubrication is where most beginners either do nothing or do far too much. The rule is: a tiny amount, in the right places, and never on the yarn path.
Where to lubricate:
- Under the cams and nylon sliders — the highest-friction contact point in the machine. A very light touch of lubricant here is the single most effective spot.
- Gear teeth — a light touch on the main drive gear teeth, then turn the crank a few full rotations to spread it.
- Crank handle pivot — a single drop where the handle meets the body, if it squeaks or feels gritty. A stiff crank is often just yarn wound into the gears plus dry contact points, so clean first, then lubricate.
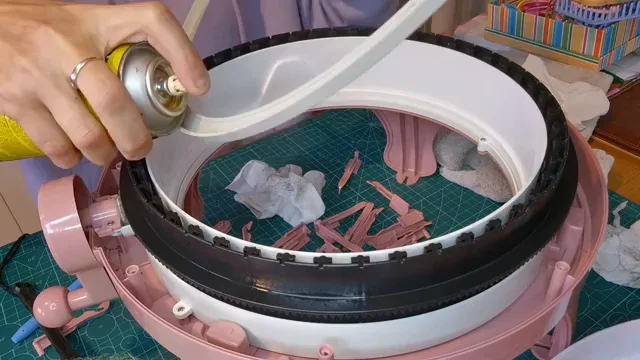
How much: Less than you think. One small drop per point, then crank the machine empty for 20–30 rotations to work it in. Wipe away any excess — lubricant that migrates onto your yarn will stain your project. Keep lubricant off the needle bed and away from anywhere the yarn travels.
How NOT to lubricate:
- Don’t spray lubricant blindly into the machine (and never WD-40).
- Don’t oil the needles themselves or the yarn path.
- Don’t use cooking oil or other food oils — they turn rancid and gummy.
Part 3: The Sponge Strip Check (Every 3 Months)
According to parts supplier Gerald Nimchuk’s maintenance guide, the machine has a foam pressure strip that holds the needles in position, and it compresses over time. Every three months, check it: if the foam has compressed below 3/8 inch (about 1 cm), replace it. A flattened strip lets needles wobble, which causes exactly the mysterious dropped stitches that frustrate beginners.
Source note: this 3-month / 3/8-inch rule comes from a single supplier source. It’s a sensible preventive check, but cross-check against your machine’s manual.
Maintenance Schedule (Cheat Sheet)
| Frequency | Task |
|---|---|
| After every 2–3 projects | Brush the needle bed, gears, and tensioner |
| Daily / heavy use | Deep clean (taking the machine apart) about every 1–1.5 months — Ailana Hecho a Mano’s routine |
| Occasional hobby use | Deep clean every 2–3 months is usually enough — adjust for how linty your yarn is |
| Monthly (heavy use) | Full clean + lubricate the cam, slider, and gear contact points |
| Every 3 months | Sponge strip check; inspect needles for bends |
| Before long storage | Clean, release the yarn tension, store dry and out of direct sunlight |
Don’t follow the calendar alone. Watch how the machine behaves: if the crank starts turning with difficulty, you hear a “clac, clac” noise, or stitches start dropping, that’s a sign it needs checking or cleaning — even if your scheduled clean isn’t due yet.
Storage tip: Releasing the tensioner before long storage matters — constant tension on the spring weakens it over time.
5 Signs Your Machine Needs Maintenance Now
- The crank is noticeably harder to turn than when the machine was new — almost always lint in the gears or dry contact points.
- Clicking or grinding sounds while cranking. (If it starts after you’ve set the tension very tight, loosen the tensioner one notch first.)
- Sudden dropped stitches with a yarn that used to work fine — check for a dirty tensioner or a bent needle before blaming the yarn.
- The row counter sticks or skips (models with a counter) — brush out the dust around the counter gear. If it still skips after cleaning, that’s a hardware issue, not a cleaning issue.
- Visible fluff packed around the needle bases.
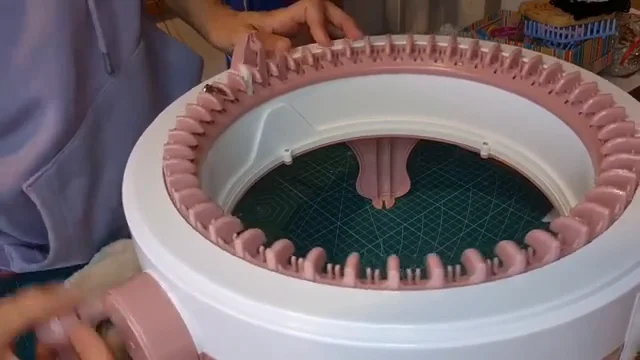
Why the list above is symptom-based, not just calendar-based: Ailana Hecho a Mano’s advice is to pay attention to the machine’s behaviour rather than only following a maintenance calendar — a crank that turns with difficulty, a “clac, clac” noise, or stitches starting to escape are the signals that it’s time for a check or a clean.
FAQ
What lubricant should I use on my Sentro knitting machine?
A plastic-safe, silicone-based lubricant in very small amounts on the moving plastic parts — the cams, sliders, and gear teeth. Avoid the yarn path and needle bed. Never use WD-40: it’s a solvent, not a lubricant, and leaves parts drier than before.
Can I use WD-40 on my Sentro?
No — see above. This is one of the most consistent warnings from Sentro parts suppliers.
How often should I lubricate my Sentro?
Lightly, about once a month under regular use, and only on the contact points listed above. Over-lubricating attracts more lint, which defeats the purpose.
My machine is brand new — does it need maintenance?
A quick check is still worth it: brush out any manufacturing dust and confirm the crank turns smoothly before your first project. Then follow the schedule above.
The crank is still stiff after cleaning and lubricating. What now?
Re-check the gears underneath for compacted lint (it’s often deeper than it looks), make sure a drop of lubricant actually reached the cam/slider contact, and inspect for a bent needle dragging. If it persists, the gear set or crank assembly may need replacing.
Keep Learning
- Watch the original tutorial: “Como Aprender a limpiar y a lubricar tu Máquina sentro” (Spanish)
- Choosing a machine? Compare the 22, 32, 40 and 48 needle models.
- More help: see our troubleshooting guides for dropped stitches, jamming, and gear noise.
Regular maintenance is what keeps a Sentro cranking smoothly, project after project. Fifteen minutes, a soft brush, and a drop of lubricant — that’s the whole secret.
— The SENTRO Store team


