

Lost your manual for the Sentro 48-needle Blue machine, or bought one second-hand? This guide walks through the original 1-page, 4-column instruction sheet in plain order: how to set it up, how to knit a tube, how to knit a flat panel, how to change yarn, and how to recover a dropped stitch. The original PDF is linked at the top and bottom of this article.
Download the original Sentro 48-needle Blue user manual (PDF)
Note on the model number: the PDF is filed on the site as the Blue 843 manual, and the instruction sheet itself confirms 48 hooks in Figure 1. The number 843 does not appear printed inside the sheet itself, and the sheet does not print the words “48 needles”, so this article states 843 as the filed model, not as a number printed in the manual. The sheet is SENTRO-branded throughout.
At a glance: the 48-needle Blue machine
| Item | What to know | Source |
|---|---|---|
| Needles | 48 hooks (Figure 1); flat panel uses 44 | Instruction sheet Figure 1; product archive for flat-panel count |
| Colour | Blue | Store product images and product page |
| Tube size | About 24 cm across | Product archive (not stated in the manual sheet) |
| Panel width | About 32 cm | Product archive (not stated in the manual sheet) |
| Yarn range | 1.5–4.5 mm in the product archive; the manual sheet itself gives no numeric yarn weight, only qualitative guidance below | Product archive for the range; manual sheet for the qualitative guidance |
| Tension | Four settings in Figure 4: 1 tight, 2 moderate, 3 loose, 4 tightest (for thinner yarn) | Instruction sheet, Figure 4 |
| Row counter | Shown as a part label in Figure 1, and the sheet says to zero it before tube knitting; it gives no detailed counter operation | Instruction sheet only; this article does not present the counter as a selling point |
| Modes | Tube knitting and panel knitting, selected with a switch | Instruction sheet |
| Switch direction | Down for tube (T), up for panel (P), on this 48-needle sheet | Instruction sheet |
Do not copy the switch direction from another model. Each model’s direction must be checked on its own sheet.
How to tell this is your machine
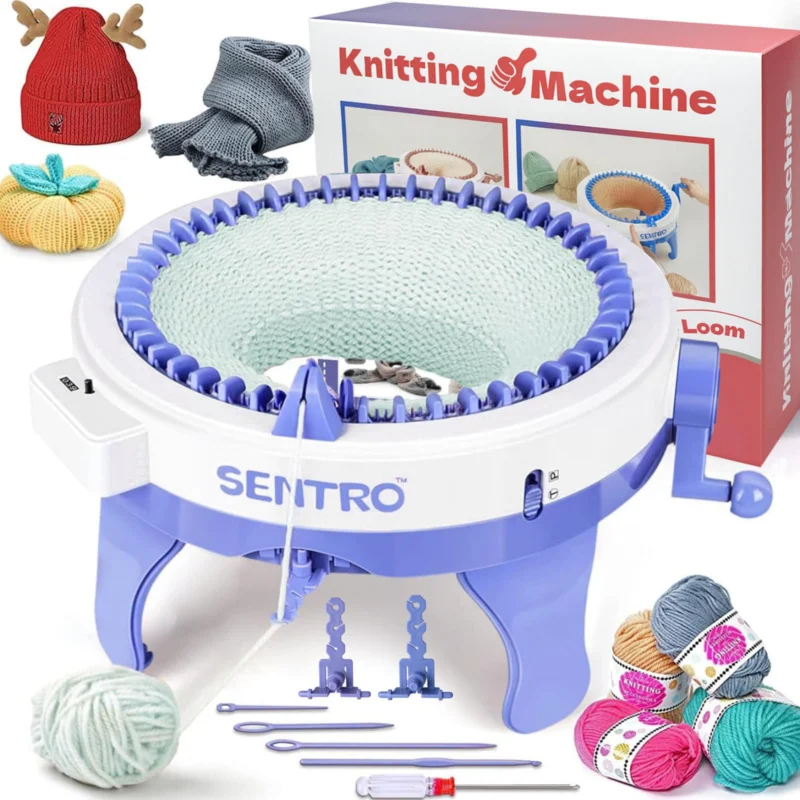
Look for a blue machine with 48 hooks around the top, a yarn guide, a tension lever, a handle on the side, and a row-counter box. The Blue version is fixed with pillars and suction cups, not with reinforcement brackets. If your machine has reinforcement brackets for clamping to a table, it is the Upgraded version, not this Blue version; see the Upgraded guide linked below.
Setup
- Insert the machine pillars into the slots in the bottom of the machine and tighten the screws.
- Fit the suction cups into the pillar slots.
- Put the machine on a flat, stable table. It will not work well if it rocks or slides while you crank.
- Hold the top steady with one hand and crank with the other.
Choosing yarn and tension
The manual sheet does not give a yarn weight number, so use its qualitative rules first and test a swatch before starting a project:
- Most ordinary yarns can be used, including the yarn supplied in the box, but do not use bulky yarn. Eyelash/fur yarn is not ideal but may work.
- Start with a medium (worsted) yarn in two tension slots; try all three slots for finer yarn.
- If the tension is too tight, release the yarn from the tension slots one at a time until it runs smoothly.
- Wind yarn into a ball so it unwinds freely. If you work straight from a hank, pull out 2–3 metres of slack at a time and keep the yarn loose as it feeds in.
- While knitting, keep a loose pile of yarn feeding in, gently pull the finished fabric down from below from time to time, and untwist it as it grows so it does not bunch up and skip stitches.
For a fuller yarn guide, including fibres that tend to jam, see Best Yarn for a Sentro Knitting Machine.
Threading and the first rows
The written threading section in the 48-needle sheet is brief: it points to a start video through QR codes, rather than giving a hook-by-hook written cast-on. This article therefore does not invent a detailed cast-on that is not in the sheet. Use the steps below as the sheet’s written sequence, and use the beginner guide for a fuller general walkthrough.
- Set the tension as in the next section: thread the yarn through the yarn guide opening, pulling it down into the groove at the bottom, lift the tension lever, and thread the yarn through until it comes out at the bottom.
- Pass the yarn under the hooks, cranking slowly and without skipping any hook. The first 3–4 rows are the foundation rows: go especially slowly and do not skip a hook.
- Keep the yarn loose as you crank. Speed and force are the fastest way to damage the machine and drop stitches.
- Before tube knitting, zero the row counter, as the sheet instructs. The sheet gives no further counter operation.
For a step-by-step beginner walkthrough, see Learn to Use Your SENTRO Knitting Machine: A Beginner’s Guide. That guide is based on the 48-needle machine, so its method applies directly here; follow its needle count only for this 48-needle machine.
Tube knitting
- Slide the switch down (T) for tube knitting.
- Knit in one direction, turning the crank clockwise at a steady, slow pace for the first rows.
- A tube closed at one end makes hats, bags and similar items; an open tube makes scarves, leg warmers and similar items.
- To finish a tube, stop when it reaches the length you want, with a white hook beside the yarn guide, and follow the sheet’s removal steps in the next section.
Panel (flat) knitting
- Slide the switch up (P) for panel knitting.
- Turn the crank in one direction until it reaches its limit, then reverse direction and crank back. Alternate directions at each end.
- At each turn, crank fully to the stop until the machine comes to a complete halt. Short turns at the ends are a common cause of dropped stitches at the edges.
- The sheet gives no separate panel bind-off step; its bind-off section is headed for a tube. Do not present the tube bind-off below as a panel-specific step from the sheet.
Changing yarn and removing your work
- To change colour or join a new ball, knot the new yarn to the old yarn with a square knot that will not slip, trim close to the knot, and take the yarn off the tension lever so the knot can pass through. Pull the yarn through the tensioner until the knot is past, re-thread it, and start cranking slowly again.
- To remove a tube, stop at the length you want and cut a tail of about 45–60 cm. Take that tail out of the tensioner and yarn guide, thread it onto a plastic sewing needle, and, with no yarn feeding in, work it through the stitches one by one, alternating front and back, until every stitch has yarn through it. Then crank clockwise so all stitches come off the hooks.
- For an open tube, such as a scarf, backstitch the last few stitches with the sewing needle, knot and trim. For a closed tube, such as a hat, pull the loose end tight to gather the opening, knot and sew it closed. Picking up the last row with a circular needle gives a neater, more elastic edge if you prefer that finish.
If a stitch drops
The sheet has no troubleshooting table, so the points below are its dropped-stitch steps, collected here in one place. For a fuller guide, see Why Is My Sentro Dropping Stitches?.
- Test a swatch first to find the best tension for your yarn, rather than guessing on a full project.
- If the tension is too tight, release the yarn from the tension slots one at a time.
- If yarn catches on a hook, push the caught stitch from the bottom of the hook toward the back of the needle.
- If stitches keep skipping, check that the yarn is loose, pull the fabric down gently from below, and untwist it as it grows.
- To pick up a dropped stitch, crank to the last stitch before the drop, with that hook raised beside the yarn guide, find the dropped loop and the ladder bars above it, and use a crochet hook to work the loop up bar by bar from front to back until it is back on the machine hook.
Care and storage
Keep the machine clean and dry, and do not force the crank if it stiffens. For cleaning and lubrication in detail, see How to Clean and Lubricate Your Sentro Knitting Machine.
More manuals and related guides
- SENTRO Knitting Machine User Manual — all models
- Sentro 48-Needle Blue Knitting Machine (product page)
- Best Yarn for a Sentro Knitting Machine
- Why Is My Sentro Dropping Stitches?
- How to Clean and Lubricate Your Sentro Knitting Machine
Direct links to the 48 Pink, 48 Upgraded, 32-needle and 40-needle manual articles are to be added after their real URLs exist. Do not guess their slugs in advance.
Download the original Sentro 48-needle Blue user manual (PDF)
FAQ
Where can I download the Sentro 48-needle Blue manual?
Use the download button above, which links to the PDF already in the site media library, or go to the User Manual hub page and choose the 48-needle Blue (843) card.
Does the 48-needle Blue machine have a row counter?
The instruction sheet labels a row counter in Figure 1 and says to zero it before tube knitting, but it gives no detailed counter operation. Count rows by hand as a check if you need an exact count. This article does not present the counter as a selling point.
What yarn works on the 48-needle Blue machine?
The manual sheet gives no numeric yarn weight. In practice, use a medium yarn first, test a swatch, avoid bulky yarn, and use two tension slots for worsted yarn or all three for finer yarn, as described above. The product archive range is 1.5–4.5 mm.
Why does my panel drop stitches at the ends?
On panel knitting, crank fully to the stop at each turn until the machine halts completely. Short, incomplete turns at the ends are the sheet’s own explanation for edge drops.
Is the Blue manual the same as the Pink or Upgraded manual?
No, not as a file. Blue uses the 843 sheet with pillars and suction cups. Pink uses the 843 Pink file, and Upgraded uses the 843P installation sheet with reinforcement brackets for desktop fixing. Their tube/panel methods follow the same 48-needle switch direction, but their installation and download files differ, so use the file for your own version.


