

Lost your manual for the Sentro 40-needle machine, or bought one second-hand? This guide walks through the original 1-page illustrated instruction sheet in plain order: how to practise and set up, how to knit a tube, how to knit a flat panel, how to change yarn, and how to take your work off and finish the ends. The original PDF is linked at the top and bottom of this article.
Download the original Sentro 40-needle user manual (PDF)
Note on the file name: the PDF is filed on the site as the 840A manual, and the instruction sheet itself confirms 40 needles. The number 840A does not appear printed inside the sheet itself, so this article describes it as the 40-needle sheet filed under 840A, not as a model number printed in the manual.
At a glance: the 40-needle machine
| Item | What to know | Source |
|---|---|---|
| Needles | 40 needles | Instruction sheet, parts diagram |
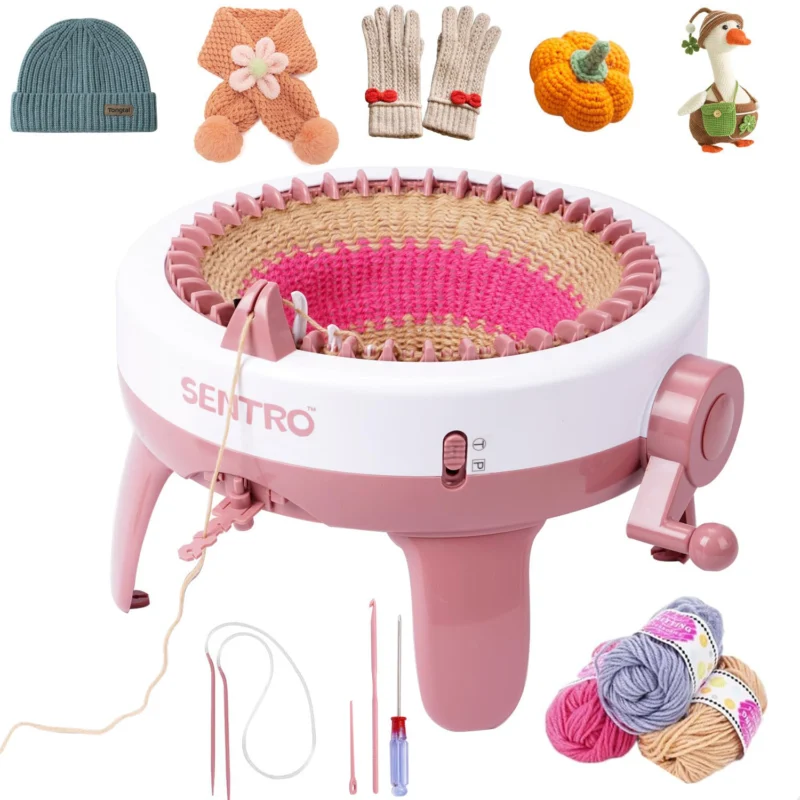
| Body | White top band with pink lower body, pink SENTRO mark on the front; 40 pink hooks around the top | Store product images |
| Tube size | About 20 cm across | Instruction sheet, tube method |
| Panel width | About 26 cm | Product archive (not stated in the manual sheet) |
| Yarn range | 1.5–4 mm in the product archive; the manual sheet itself gives no yarn weight, fibre or thickness standard | Product archive for the range; manual sheet gives no yarn specification |
| Tension | Three settings: loose, moderate and tight | Instruction sheet, tension diagram |
| Row counter | The store listing does not list a built-in counter, and the product images show no counter box on the front left | Store listing and product images (the manual sheet does not discuss a counter) |
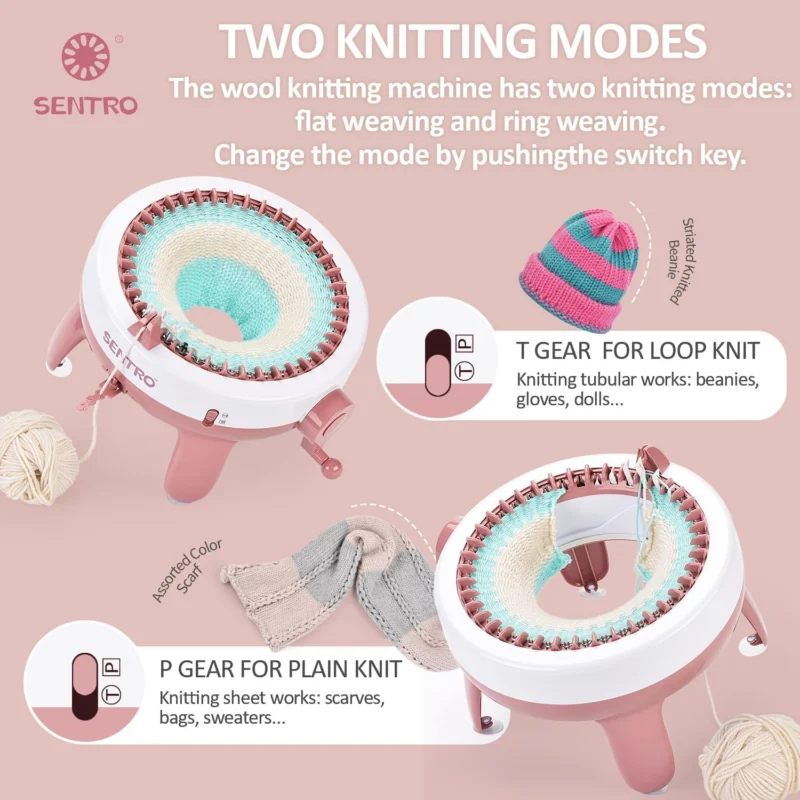
| Modes | Tube knitting and plain (panel) knitting, selected with a knit switch | Instruction sheet |
| Switch direction | By label only (Tube/Plain); up/down direction not stated in this article — see note below | Conflict between sources, see draft notes |
Switch direction — read this before you knit. The 40-needle sheet’s step text and the 40-needle store product image note give opposite up/down directions for tube versus plain. This draft therefore describes the switch by its labels, Tube and Plain, and does not state an up/down direction. Follow the labels on your own machine, and do not copy another model’s direction here.
How to tell this is your machine
Look for the white top band and pink lower body, 40 pink hooks around the top, a pink crank on the right, and a pink vertical slider on the front right for the tube/plain switch. The key difference from the 48-needle machine is the front left: the 40 has no protruding counter box there. Its body is also narrower than the 48 (about 360 mm wide in the store diagram, against about 410 mm for the 48).
Setup and practice
- Put the main body on a stable, flat table.
- Set the knit switch to the tube position.
- Turn the handle clockwise with no yarn for a while first, to get used to the movement, before you start threading.
- Thread the yarn through the yarn guide and tension lever as shown in the sheet’s tension diagram, using the loose, moderate or tight slot that suits your yarn. Keep the yarn loose throughout: the sheet repeats this point at every stage.
Threading and the first rows
- Set the switch to tube knitting.
- Put the yarn inside the cylinder.
- Turn the handle forward so the centre front needle rises, and pass the yarn through the inside of that hook, on the right side of the yarn inlet.
- Work alternate needles: thread one needle, skip the next, and keep turning the handle slowly clockwise, threading through the inside of one hook and behind the next, until you have gone all the way around the cylinder. The last needle should be threaded from behind.
- Pass the yarn through the yarn inlet and onto the yarn holder, and keep it loose.
- For the first few rounds, crank slowly. After four or five rounds, pull the starting tail inside the cylinder tight, then continue.
Tube knitting
- With the switch on tube, keep cranking clockwise at a steady pace.
- Release the yarn in front of the yarn inlet as you go, so it does not tighten up.
- Go slowly for the first three rounds. After four or five rounds, tighten the starting tail as described above.
- The tube is about 20 cm across, and its length is up to you.
Plain (panel) knitting
- Set the switch to plain knitting.
- Turn the handle counter-clockwise to its limit.
- Thread the machine in the same way as for tube knitting.
- Knit by alternating directions: crank one way to the limit, then reverse and crank back, repeating to the end of the panel.
- Before you remove a finished panel, set the switch back to tube, then follow the removal steps below. The finishing method is the same as for a tube.
Changing yarn
When the yarn runs out, or you want another colour, knot the new yarn to the old yarn, trim the surplus ends close to the knot, join the new yarn as shown in the sheet, and keep cranking. Start slowly after a join so the knot passes cleanly.
Removing your work and finishing the ends
- Take the yarn out of the yarn inlet and cut it about 30 cm from the fabric.
- Hold the cut end upright and turn the handle slowly clockwise. The fabric will gradually come off the needles. Take it out carefully from below the main body, and make sure the stitches do not unravel.
- If the yarn will not separate smoothly from the needles, use the special sewing needle supplied with the product to help it off.
- To finish the end, work a little more than you need, then undo the surplus part so the edge is neat.
- For the finishing end, thread the tail through the eye of the sewing needle, pass it through every edge stitch once without missing the last stitch, form a loop, pass the needle through the loop and pull tight, then sew a few more stitches into the fabric and trim the surplus.
- For the starting end, pull the starting tail tight to gather the end of the fabric, pass the sewing needle through the fabric to form a loop and pull tight, then sew a few more stitches and trim. The sheet calls this result a cap knot.
- For a fuller yarn and finishing guide, see Best Yarn for a Sentro Knitting Machine.
What the sheet does not cover
The 40-needle sheet is a single illustrated page, not a full handbook. It has no box-contents list, no yarn-weight specification, and no troubleshooting table, and it has no standalone safety chapter. The only caution stated in the sheet is a general household-use note: the product is for household knitting, and its methods are for this product and may differ from industrial knitting methods. Do not add an age limit, a safety warning list, or a troubleshooting table and present it as sheet content.
For problems in practice, use the site’s own guides instead, and label them as such:
- Dropped stitches and tension: Why Is My Sentro Dropping Stitches?
- Cleaning and lubrication: How to Clean and Lubricate Your Sentro Knitting Machine
- General beginner walkthrough: Learn to Use Your SENTRO Knitting Machine: A Beginner’s Guide — based on the 48-needle machine, so follow its method, not its needle count, for the 40.
Box contents — from the store diagram, not the sheet
The manual sheet itself has no box list. The store product diagram lists the following set, and this list is included here only as a store-diagram list, verified against product image 5 on 2026-10-27: 3 balls of yarn, 1 crochet hook, 1 sewing needle, 4 support legs, 1 yarn holder, 4 screws, 4 suction cups, 1 screwdriver, and 2 instruction sheets. This list is from the product image, not from the manual sheet.
More manuals and related guides
- SENTRO Knitting Machine User Manual — all models
- Sentro 40-Needle Knitting Machine (product page)
- 40 Needle vs 48 Needle Knitting Machine: Which One Should You Choose?
- Best Yarn for a Sentro Knitting Machine
- Why Is My Sentro Dropping Stitches?
- How to Clean and Lubricate Your Sentro Knitting Machine
Direct links to the 32-needle manual article and the other model articles are to be added after those articles are created, with their real URLs. Do not guess their slugs in advance.
Download the original Sentro 40-needle user manual (PDF)
FAQ
Where can I download the Sentro 40-needle manual?
Use the download button above, which links to the PDF already in the site media library, or go to the User Manual hub page and choose the 40-needle (840A) card.
Does the 40-needle machine have a row counter?
The store listing does not list a built-in counter for this model, and the product images show no counter box. Some third-party listings use counter wording in their titles, but that is not the store listing for this model. Count rows by hand or with a separate counter if you need an exact count.
What yarn should I use on the 40-needle machine?
The 40-needle sheet itself gives no yarn weight. The product archive range is 1.5–4 mm, and the site’s yarn guide covers medium weights in detail. Start with a smooth medium yarn, test a swatch, keep the yarn loose, and use the loose, moderate or tight tension slot that runs cleanest.
Why does my panel drop stitches at the ends?
On panel knitting, alternate directions fully to each limit, and keep the yarn loose. If edge stitches drop, check the tension slot first, then check that you are reversing fully at each end, rather than turning short.
Is the 40-needle manual the same as the 48-needle manual?
No. The 40-needle sheet is a separate 1-page sheet for 40 needles, with its own parts, tension diagram and finishing steps. In particular, do not assume its switch direction matches the 32-needle sheet or the 48-needle machine until the direction is confirmed, as noted above.


